
Welcome to Day 1 of the Papertrey Ink April Release Countdown!
Papertrey Ink Day 1 Countdown!
I was asked to be on the Papertrey Ink Design Team! I am beyond thrilled and excited. I love playing with these wonderful products. Everything will be available for purchase beginning at 10 PM ET, Thursday the 28th!
Today, I created cards and projects using
Feathered Friends Mini 22 stamp set and dies
Elegant Edges: Leaves
Inside Greetings: Everyday stamp set
Go-to Gift Card Holder: Book dies
Go-to Gift Card Holder: Book Pocket dies
Go-To Gift Card Holder: Scrolls Stamps and dies

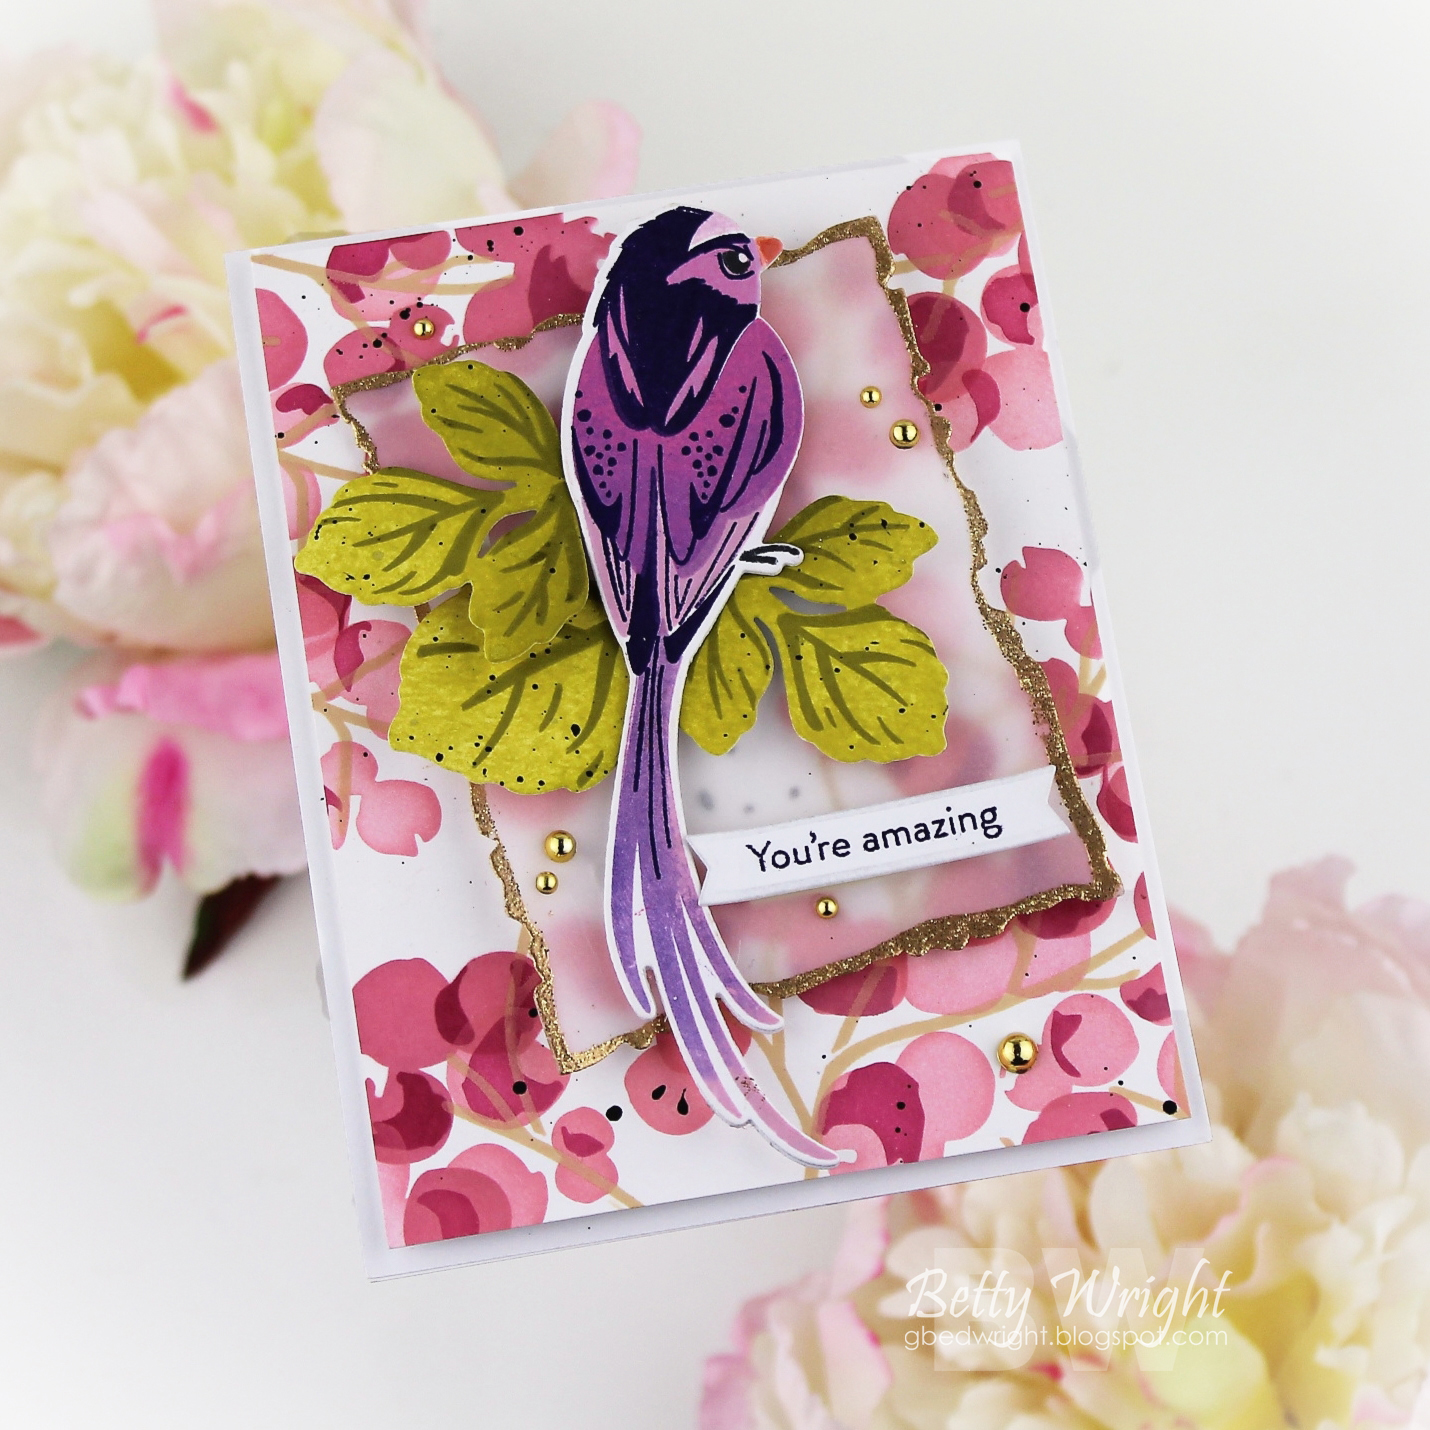
My first card combines the new Feathered Friends Mini 22 stamp set and dies with the Berry Branches Stencil Collection. I chose to just use two of the stencils. I wanted to create more color and drama in the background. My tip for you is to turn or flip your stencils to create more varied patterns.

Next, I used the Posies and Sprigs stamp set and Posies and Sprigs die set to give my Feathered Friend 22 something to sit on. My tip for you is to ink blend panels with direct to paper technique, add water and ink splatters. Let the panel dry. Stamp the detail portion of leaf stamp and die cut for a different effect.

I die cut a piece of vellum using the Love to Layer: Torn Edges die. I used a versamark pen to outline around the edges. I gold embossed. I added the bird and leaves to the top of the vellum using foam tape. I added more foam tape behind the vellum hidden behind the bird and leaves to secure the frame to the panel. I finished the card with a few gold pearls.

My second card is similar to the first with more of a masculine vibe. My tip for this Feathered Friend 22 bird is to ink blend the entire die cut. then add just the detailed stamps for a different look. I also used the Berry Branches Stencils Collection for this card. I chose to make the berries green for a leafy background. I flip the stencils to create a fuller look.


My third card uses the Elegant Edges: Leaves


Next, I ink blended and die cut the Border Bling: Skinny Diagonal Frames die. I added a piece of vellum behind. I recommend stamping the sentiment before you add the frame. I am using the Inside Greetings: Everyday stamp. I stamped the sentiment using versafine onyx black and clear embossed.

I stamped and die cut the branches that come in the Feather Friends Mini 22 stamp set and dies. My tip is to stamp and die cut several of the branches and Tuck in portions of the stamped and die cut branch to create fuller, varied looks. I used the Posies and Sprigs stamp and Posies and Sprigs die set for the flowers. I finished the card with a few gold pearls.

Inside Greetings: Everyday stamp set. I also used the Go-To Gift Card Holder: Scrolls Stamps and dies.

I used the Elegant Edges: Leaves die. Use edge die on both sides of a card stock panel to create unique background frames. Create a template for the edge die to use each time you create for perfect placement of dies.

I also used a few of the small stamps from Card Holder: Scrolls Stamps and dies to create a full background. I stamped a few of the images and tucked around the frame. I ink blended the edges of the panel and frame to draw the eye in to the sentiment. I finished the card with a few gold pearls.

My next project is a fun gift book using the new
Go-to Gift Card Holder: Book dies
Go-to Gift Card Holder: Book Pocket dies
Go-To Gift Card Holder: Scrolls Stamps and dies.

I stamped the book cover using the Loosely Woven stamp set. I created the binding using my Score Pal to create the vertical lines. I ink blended to created dimension and depth. It also gives a worn effect.

I used Into the Blooms: Dahlia die for the leaves. I ink blended two panels. I added splatters. I let the panel dry then die cut the leaves. I attached the leaves directly to the book so that the band can slide on and off over them.

I added a heart tag using the new stamp set from Special Guy stamp set and the Go-Gift Card Holder Bookmark dies.

I created a belly band using two of the bookmarks. I tied it on with some twine. I added a couple of dark chocolate buttons.

I added a pocket and a die cut Love to Layer: Torn Edges to the inside stamped using the new stamp set from Special Guy stamp set. Now, you can add a gift card, sweets, or cash to complete this wonderful gift.
Which card is your favorite?
Here is a list of many of the products I generally
use every time I make a card.
As always thanks so much for stopping by!


As is always the case your projects are absolutely gorgeous, Betty. I am so very thrilled to see you joining the PTI design team. Your talent and creativity will make PTI's products shine! They are so lucky to have you.
ReplyDeleteAll your cards are lovely, that first one is stunning!
ReplyDelete