Sunday, August 31, 2014

S.W.A.K! Sending You LOVE!


MFTWSC191
Happy Sunday!  Back today with another card.  This time I am playing along with this week's MFT Weekly Sketch Challenge and Fusion Inspiration Challenge.  Finally got a chance to play with some new stuff!  Pure Joy I tell you!


For my card I started with MFT Card stock sampler.  I used kraft, primitive cream, and paver red.  I used Blueprints 18 to cut the paver red panels.  I did run both panels through twice to make them smaller so the space in the center would be wider.  I used Stencil on the Diagonal and Gray Grout ink to ink up the kraft panel. This look is subtle.  It does not show up well in the picture, but it does IRL.  Next, I inked up the BG Gingham Background in watermark ink.  I inked up this stamp sort of haphazard to create a more distressed or rustic stamping impression to work with the distressed inspiration photo.  Then, I die cut my letters using MFT By the Letters Uppercase die namics.  I used a lighter weight card stock to cut the letters again to glue together for some stability.  I inked distressed the edges and added foam tape.  I used the same lightweight white card stock to cut out MFT You Got Mail envelop die namics.  I inked the edges and glued closed.  I used MFT You've Go Mail stamp set to add a few sentiment/image accents to the envy.  

Next, I used the Tag Talk die namics to die cut a plain tag.  I stamped the sentiment from  MFT You've Go Mail stamp set.  I die cut a hole reinforcer for this tag using the paver red card stock.  I realized the little holes were the perfect size for punctuation for my S.W. A. K. sentiment so I die cut both to get 4 periods using the same Tag Talk die namics hole reinforcers dies.  I inked distressed my punctuation, too.   I added an electric red heart die to the center of the envy using Blueprints 11.  I then die cut a blue paper clip using MFT Office Supplies.  I assembled my card.  I finished with some hemp cord looped and knotted through sentiment tag.   I am also playing along with Simon Wednesday Challenge:  Anything Goes!

As always thanks so much for stopping by!

Betty


Saturday, August 30, 2014

Thinking of You!


Well, school has definitely started back!  Seems like ages since I have had a chance to create/play in my craft room.  I finally had a few moments today!  I am playing along with this week's Mojo Monday Sketch, Just Us Girls, and Sunday Stamps Color Challenge. 


For my card I am using BasicGrey dp.  I am using a 3.5 X 5.5 tall skinny card base.    I used a skinny oval die and stamped the flowers.  I inked the stems in Memento Pear Tart.  I inked the flowers in Memento Angel Pink.  I rocked and rolled the edges slightly using some


PTI hibiscus burst for some added depth.   The flowers with stems image comes from Verve's Kind Words stamp set.  I stamped the sentiment from the same set using some Palette Noir black ink.  I added a die cut pattern paper heart from Verve's Cut Above Heart Quartet dies.  I finished my card with some clear crystals and Verve's Pastel Sequin Mix.      

https://blogger.googleusercontent.com/img/b/R29vZ2xl/AVvXsEh97IBeTZ-rvhsSTqqv8-dyXrxMK2ILgRmuP6WvrDioFmkHbuw6STz32iVCj7jr0QaDHKCt5xRJfTlC9ESBc2wMRaHferIobLuK0Cti_OzI5U1Q7d1YmC25WS2EOSI8I5jRw9QUSSz9tQ/s1600/ss83f.png


As always thanks so much for stopping by!

Betty

Sunday, August 17, 2014

Thinking of You!


MFTWSC189 
I have a card to share today!  I  am playing along with this week's MFT Weekly Sketch Challenge and the Fusion Card Challenge.


I chose to use the inspiration from the Fusion Challenge.  I played off of the white gray background and the cluster of flowers. 


I started with MFT  Grout Gray as the base.  I used the Modern Moroccan Cover Up in Sweet Tooth.  I die cut the gray grout center panel using Pierced Rectangle Stax.  I die cut the vellum panel using the tag from Tag Builder Blueprints 1.   I die cut the Wildflowers using Smooth White card stock.   

I stamped the dies with the coordinating set, LJD Peaceful Wildflowers.  For the centers of the yellow flowers, I used a solid circle image from LJD Fall Foliage.   I clustered the flowers together and tied with a piece of pink hemp cording.  I used foam adhesive to adhere to the vellum tag.    I added the sentiment from LJD Peaceful Wildflower stamp set using black ink.  I finished the card with  some homemade white enamel dots.  

As always thanks so much for stopping by!

Betty

Saturday, August 16, 2014

Thinking of You!


 Happy Saturday!  I had a few moments in my craft room today to play!  I created a card for this month's MFT Color Palette Challenge.   I am also using this week's Retro Sketch.  


Print


First of all, I just love MFT Fuse Green.  It is one of those colors that did not jump out at me at first when I purchased the MFT Card stock sampler pack.  It is one of those colors that takes on this richness all its own when mixed with other shades.  I had a chance to make several cards last month using this color.  You can see that ensemble here.   


I think these colors lend themselves to a masculine card.   I have tried for awhile now to not put a flower on every card I make.  The struggle is REAL!   For this card I am using MFT card stock sampler pack.  I stamped the nightshift blue card stock with blue ink using the BG diagonal stripes background.  I stamped it twice to give me this crisscross pattern.  I die cut the orange fizz and fuse green using MFT Pierced Rectangle Stax die namics.  I used the Darling Dots stamp set and versamark to stamp the dotted pattern onto the fuse green.  I used the Notebook Edge die namics to die cut the kraft card stock.  I stamped this panel with the BG Notebook paper background using MFT natural ink.  I ink distressed the edges.  The nightshift blue circle was die cut using the circle element in Blueprints 12.  The kraft circle element was die cut from Blueprints 18.  The orange fizz tab was die cut using Blueprints 12.  I used the button die from Blueprints 14.  I created a bow using the hemp cord.  The sentiments are from LJD Fall Foliage stamp set and the other from You've Got Mail set stamped with nightshift blue ink.  

As always thanks so much for stopping by!

Betty

Friday, August 15, 2014

This Hope! VLV Weekly Sketch!


Happy Friday!  It is time for week 3 of Verve's Viva La Verve Sketches.   Stacey Schafer is the host this week!  She has a sketch + inspiration this week.  Check out the VLV Blog for more details and inspiration!


For my card I am using Simple Stories DIY Boutique designer papers.   I used Verve's Strong Anchor along with Verve's Cut Above Nautical, Occasion Frame, and Rounded Scallop Frame die sets.  I decided to emboss the Nautical elements in white. I finished my card with Verve's Shine Bright Sequin Mix.  

In keeping with the text background I chose this fun patterned paper.  I decided to go with this wonderful scripture and mimic the chalkboard look since inspiration does have a chalkboard.  I used red accents and embossed the Nautical elements in white on red. I added some stamped red rope frames behind the focal point.  I added a red floss bow. 

As always thanks so much for stopping by!

Betty

Thursday, August 14, 2014

You've Been On My Mind! PTI MIM Challenge!


I am popping in tonight with a card for this week's Papertrey Make It Monday Challenge!  It has been a busy week.  I went to school this week and moved my classroom and got it decorated.  I am teaching 7th grade this year.  My summer vacation is almost over.  I have 1 day before I officially return!  

This week's PTI challenge is using embossing paste to create backgrounds.  I have used embossing paste once before.  It is one of those techniques where you do have to plan ahead and allow for drying time.  Other than that, it is like frosting a cake.


I started with white card stock and the harlequin die to create a stencil.  I  combined paste and Spring Rain reinker.  I decided I wanted it darker so I added some Enchanted Evening reinker.  I added for a highlighted effect some plain white paste over the darker blue.  I let it dry.  I added gold embossed vellum feathers from Feather Finery set, a sentiment from Friendly Flowers, and some tiny clear gems and my card was complete.

As always thanks so much for stopping by!

Betty 

Friday, August 8, 2014

Just A Note and a Shaker!


MFTWSC188Happy Friday!  I have two cards to share today!  For the first card I am playing along with this week's MFT Weekly Sketch Challenge and The Color Throwdown!  I just love this color combo!  

I am using MFT Card stock Sampler (blu raspberry, red hot, gray grout, and sweet tooth).  I started with a gray grout base cut to 5" square.  I die cut the blue raspberry panel using Blueprints 14.  Then, I die cut the red hot and sweet tooth panels using Pierced Rectangle Stax.  I used Blueprints 1  for the stitched sentiment circle, and Blueprints 12 for the red tab at the top.  I went back to Blueprints 14 for the gray grout button.  This is what I love so much about my Blueprints.  I really do use all the parts and pieces.   For the sweet tooth focal panel I used the script image from Pretty Poppies in gray grout.  I stamped the stems.  Then, I die cut one of the poppies from Poppies and Leaves die namics.  I added some noir black glitter to the center and the card was complete.

The background on my card was done using a new technique for me. I had never tried it before.   It is called Embossing Folder stamping.  Here is the link to the tutorial.  I pretty much inked up an embossing folder on the raised panel side, spritz with water, put card stock inside, close folder, and press down.  I may have spritzed a wee bit too much water, but I really loved the results.  I dried mine with the heat gun.   I am also playing along with Cas-Ual Fridays Tic  Tac Toe Challenge (bottom dots, gray, and twine)!


 This next card is another card I made for one of the Dare to Get Dirty Challenges going on now at SCS!  I decided to create a scene and make the scene a shaker style card.  Instead of adding a bunch of sequins and such, I added some white tinsel to give the look of the sailboat moving through the ocean and the salt spray(tinsel) splashing about.  I really love how it turned out.  For this card I am using MFT Card stock sampler(sweet tooth, kraft, nightshift blue, electric red, lemon drop, and sno cone card stocks).  I created my scene using Rectangle Frames to create the shaker framing.   Cloud Cover Up (just a few of the clouds), and Sailboat die namics.  For the wavy water I used the curvy panel in Blueprints 11 cut to size and staggered.  I inked these panels with some snow white pigment ink.  I added the tinsel glitter and clear acetate panel and the shaker was complete.  I mounted the shaker to a lemon drop base.  I finished the card with the ticket die from Blueprints 14.  I used kraft on one stamped with snow white pigment ink using Happy Birthday Background.  The other one I used snow white card stock, electric red ink, and Birthday Greetings for the sentiment.  I stapled the two together and added to the card.   I am playing along with Simon Wednesday Challenge: Sparkle (tinsel glitter inside shaker).  I am also playing along with Catered Crop: Shaker Challenge.

TIP:  When I make shaker cards, I have found that the white foam tape edges show from inside as well as outside.  To create a more finished look, I used a copic marker in card stock frame color to color the foam tape edging so it matches the card stock and blends in.  

As always thanks so much for stopping by!

Betty


Thursday, August 7, 2014

Sending You Christmas Joy! MIM and More!


Happy Thursday!  It has been a busy week!   With school starting back in a couple of weeks, I am trying to cram as much into my days as possible.  I did take a few moments to play in my crafty space so I made a Christmas card.   I am playing along with Papertrey Inks Make It Monday Challenge.  This week we are to make borders using non border dies.  

I chose to use the Wonderful words die: Joy.  I started in the center of the pure poppy card stock.  I die cut only a portion of the word.  Just under the open letter O.  Majority of the word is cut out.  Once the center JOY was die cut, I  then die cut the word on each end.  I  die cut the word JOY 3 times using rustic white card stock.  I used the Wonderful Words Mini Joy stamp set and embossed in white the Joy musical sentiment.  Love the way the white on white looks.  


I glued the white embossed JOY words on top of the red just staggering slightly the white so the red shows as a subtle shadow underneath.  Next, I used a Big and Bold Wishes and Big and Bold Christmas Wishes and white embossed a sentiment.  I used the Basic Background Musical Score and stamped using versamark onto the pure poppy.  I love this subtle effect.  I cut the rustic white base with a portion cut out on the left to showcase the JOY border.  I stamped the background of the rustic white using Background Basics Super Stripes in red to create a tonal plaid pattern.  I love the bold red and white combo.  I glued the pure poppy panel to the rustic white base and the card  was done.  I debated adding an embellishment, but decided I liked it as it was and it would make mailing easier.  I also like the fact that I could orient the card horizontal or vertical.  Great option.  Could even make a cool pocket style to house a family picture or gift card for the holidays. 

 I am also playing along with Christmas Card Challenges:  Embellish It option(I chose not to).  I am also playing along with the Festive Friday Inspiration Challenge.  I focused on the sending.....the JOY of the Season is on the way!  Simon Monday Challenge:  Family!  Christmas is about being with family and sharing in the Birth of Jesus!

As always thanks so much for stopping by!

Betty


Tuesday, August 5, 2014

Verve's August Diva Inspirations Hop!


Welcome to Verve's August Diva Inspirations Hop. It's the 5th of the month and that means it's time for the Divas to serve up some fresh inspiration with their Verve stamps! Leave some comment love along the hop spots for a chance to win a prize, then grab some stamps and play along with our August inspiration challenge for another chance to win!

Our August challenge is Sequined Stunner:


Sequins are the perfect embellishment - sparkly, affordable and with lots of texture. Add some sequins to your project this month to make it a sequined stunner! Feel free to use the graphic as inspiration or not.


For my card I am using Echo Park's Splendid Sunshine designer papers.  I combined Verve's Be Blessed and Better Together stamp sets along with Verve's Petal Point and  Sprightly Sprigs Cut Above Dies. 

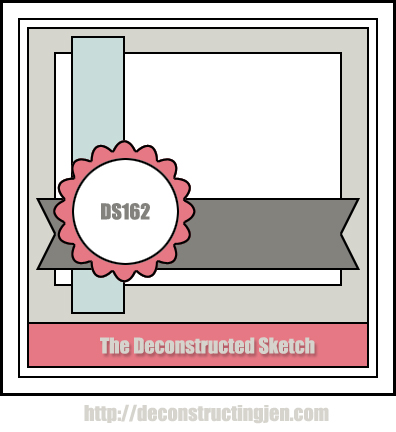
Deconstructed Sketch 162 I stamped a double sentiment in night of navy ink.  I added a multicolored layered background from Better Together behind the sentiments using a soft aqua, yellow, and pink ink.  Love how that little bit of color just adds so much.   I die cut, stamped, and white embossed the layered flowers.  I used some foam dimensionals to create more depth with the layered flower.  I tucked in some of the same designer papers using the sprightly sprigs dies.  I decided I liked the pink leaves!   I finished with a border of sequins using Verve's Shine Brightly Sequin Mix.  I also added a few to the center of the flower as well as a few to the top corner of the card.  I am using Deconstructed Sketch 162. 


Need a little inspiration? Check out the blogs linked below to see what the other Divas did with the challenge! It's sure to be a treat, and speaking of treats, we've got a prize for one lucky commenter along the hop! Check out the Verve Blog today for all the prize info and deadlines!
1. Julee7. Sarah
2. Amy8. Sony
3. Anya9. Maureen
4. Betty10. Stacey
5. Karen11. Chaitali
6. Sankari


Anni-VERVE-sary Sale
This month we're celebrating 7 wonderful years of Verve with a storewide sale!

During our Anni-VERVE-sary sale,
all of our in stock stamps, dies, ribbons and sequins are 20% off
(excluding our new releases, which are 10% off).


Next on the hop is the fabulously talented Karen! 
 

As  always thanks so much for stopping by!

Betty

Monday, August 4, 2014

Feel Better! MFT Sketch with a Color Throwdown!


MFTWSC187Happy Monday!  I have a Get Well card to share today!  I am playing along with MFT Weekly Sketch Challenge and The Color Throwdown!  

I needed a Get Well card for an adult male...grandpa status if you will.    It is difficult enough to make a manly card, but when you add the element of "sickness" or "get well," it made it even tougher for me.   How do you make it without going "girly?"  I figured I could use balloons!  

I am using MFT Card stock sampler.  I started off die cutting the rounded corner die from Blueprints 10 twice.  I used snow cone and jellybean green card stock.  I stamp the olive color using  Diagonal Stripe Background with the card stock edge turned to give me a straight line.  I used a white pigment ink and let it dry.   Next, I stamped the snow cone using the Typewriter Text background stamp in snow cone ink.  To create some visual interest I turned the card stock at an angle before I stamped.  I cut these two panels to overlay for the background on the sketch.  I stitched them, but it is difficult to see since I cover most of the stitching with the white panel which I die cut using the fishtail flag die from Blueprints 13.   Next, I used the Balloon Stax and die cut one in Red Hot card stock and one in sour apple.    I stamped the sentiment from the Get Well Wishes stamp set in versamark and embossed in Zing Rouge.  I added an additional sentiment from the set in palette noir black onto the fishtail flag.  I tied some coordinating string and had the string wrap around the lower portion of the card.  I finished with some black enamel dots.

This card is sporting some "homemade" enamel dots. I got the idea from Julia Aston who shows how she did it on her blog. Love this idea!  Thanks, Julia!

As always thanks so much for stopping by!

Betty

Sunday, August 3, 2014

Thank You and Birthday Wishes!


Happy Sunday!  I have a couple of cards to share today!  Both are all for SCS 2014 Dare to Get Dirty Challenges  for the Fan Club Members.  Not a FC Member?  Be sure to check out the Fan Club so you can join in the fun!

For the first card, I wanted to try paste.  I have to admit that I have never tried it before.  I have see it done, but never taken the plunge til now.  I must say I love the final results.  I have had this paste for over a month then saw this Recollection Milk Paint powder on sale at Michaels and decided to blend the two.  If you can icing a cake, you can do this.  

In this picture, I was mixing the green.  I used about 2 teaspoons paste for each color.  I stirred  and made sure the paste was a frosting consistency then spread over the stencil.  The paste is still a little grainy, but spreadable.

The picture to the left shows how I had the stencil taped down with post it notes going around the edges of the stencil and card stock.  This provided covering for my work area as well.    To create the look in the card I had to overlap the colors.  There were some thicker and thinner areas.   There were a few areas where the paste got underneath the center since I did not adhere the stencil down in the middle.   I was okay with that.  I like the variation and distressed look.    

I removed the stencil which die cut with MFT Cover Up.  When I peeled the stencil out of the paste there were a few pieces of the card stock left behind.  I picked those out with a needle.   It was not bad.  However, you will need to work fast so plain card stock does not get too wet and really peel.  I let it dry overnight and it was ready the next day.  

For this card I am using MFT Card stock sampler (sweet tooth, steel gray, tangy orange, razzle berry, orange fizz, gumdrop green, bubble gum), Blueprints 12, Blueprints 15, Fishnet Cover Up, Mini Rolled Roses, and Four Corners dienamicsI used LJD Blissful Butterflies for sentiment.


My second card today is for my Dare to Get Dirty Challenge (DTGDgbedwright)!  I am using MFT Card stock sampler, Blueprints 15, Tag Builder Blueprints 1, Pierced Circle Stax, Happy Birthday Background, Diagonal Stripe Background, and Birthday Chalkboard Greetings stamps.   I just love these fun colors and the cool layout!  Works fabulously for a Birthday Card!  This card is also sporting some homemade enamel dots.  I got the idea from Julia Aston who shows how she did it on her blog.  I did not use the same beads, but it worked so it is all good.

Playing along with a few blog challenges with these cards.
Simon Monday Challenge:  Letter J-  Just do it!  I used embossing paste!  Simon Wednesday Challenge:  Anything Goes!
Curtain Call:  Anything Goes

As always thanks so much for stopping by!


Betty

Friday, August 1, 2014

Just Because


Happy Friday!  It is time to kick off another month of weekly Viva La Verve Sketches.   Julee Tilman is kicking off the first week of August with a sketch and a color challenge!   Check out the VLV Blog for more details and inspiration!


For my card I am using Verve's newly released Peaceful Medallions with Petals and Wings and Beautiful Kindness stamp sets.   I also used Verve's Cut Above Wings & Petals and Flag Its dies.  I  finished my card with Verve's Shine Bright Sequin Mix. 

 I am playing along with this week's Simon Wednesday Challenge:  Anything Goes!  Shopping Our Stash:  Choose 3(I chose die cut, rhinestones, stamped doily), Simon Monday Challenge:   Inspired by letter J.  Just Because card and Jewels!

As always thanks so much for stopping by!

Betty

© The Things I Do With Paper. Made with love by The Dutch Lady Designs.