Welcome to Day 2 of the Papertrey Ink Release Countdown!
Papertrey Ink Day 2 Countdown!
Everything will be available for purchase beginning at 10 PM ET, Thursday, October 20th!
The first card uses
I started with tropical teal cardstock. I layered a panel with the decorative circles cover plate. I ldie cut an oval pierced frame. I added some tropical teal ink direct to paper (DTP) to create a look of texture. I added some white splatters.
Next, I diecut, and ink blended my flowers and leaves. I arranged all of the elements onto the card. I finished the card with a few clear sequins.
TIPS
Create a layered, textured background using the same colors
Add ink to one of the layers using direct to paper to create some variation
Add subtle color to the centers of white flowers to create depth
My 2nd card uses
I diecut several of the believe word dies and layered together. I added the panel to a vintage cream panel for a subtle contrast.
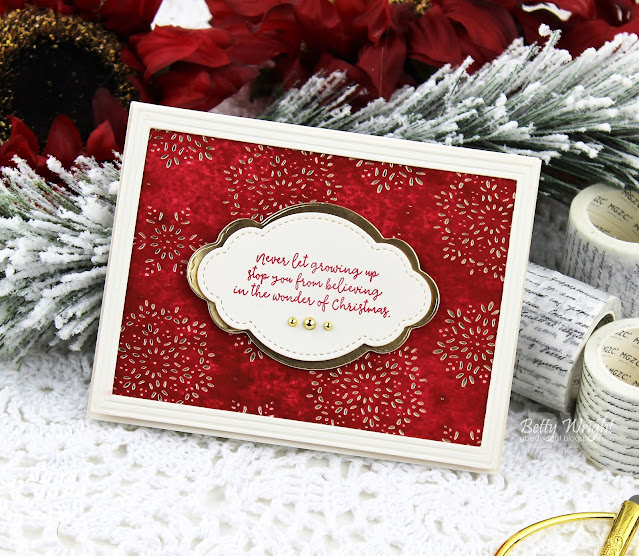
I started with white card stock. I gold foiled the snowflake background. I inkblended some pure poppy with a touch of scarlet jewel inks.
I added the embossed frame. I die cut and layered the sentiment. I finished the card with a few metallic gold pearls.
TIPS
Inkblend color to a hot foiled panel after the hotfoiling
Wipe any excess ink away to reveal a cleaned foiled design
-Allow the background to be the focal point by framing the panel and adding a sentiment to the center
Inkblend color to a hot foiled panel after the hotfoiling
Wipe any excess ink away to reveal a cleaned foiled design
-Allow the background to be the focal point by framing the panel and adding a sentiment to the center
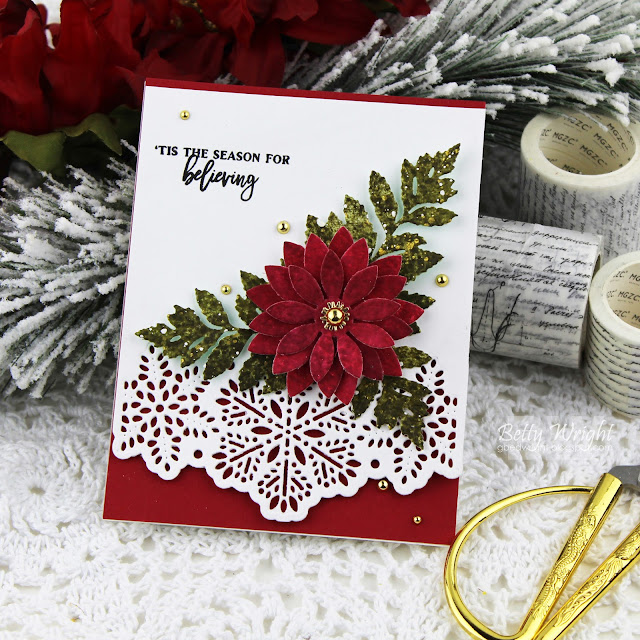
I started with a pure poppy panel. I die cut the snowflake edges using white card stock and layered the white onto the red panel.
I diecut and ink blended the flowers and leaves. I arranged the elements on the card. I finished the card with a few metallic gold pearls.
Here is a list of many of the products I generally
use every time I make a card.


Love your pretty, festive cards!
ReplyDeleteBeautiful cards. My favorite is the last one with the pretty border die cut and Dahlia bloom. TFS
ReplyDeleteBetty, each card is spectacular!! Love everyone!
ReplyDeleteAll your cards are just stunning! They are so elegant. I would be so thrilled to receive or send any of these beautiful cards. Great work!
ReplyDeleteI love your beautiful Christmas card with the snowflake border on red. Please tell me how you achieved the beautiful leaves and the shading on the flowers . I would so appreciate your help!
ReplyDelete